


How to Tear Shingles Off a Roof
 Story by:
Jimmy Bell
Story by:
Jimmy Bell
The roof forms a critical part of the home, and one of the most significant risk factors for a roof is shingles becoming damaged or worn. If your roof’s shingles are worn, they can create a fire hazard and reduce energy efficiency, costly over time. Fortunately, if you recognize damage in your home and want to tear off the shingle, this article will give you an overview of what you need.
Tools you need to Tear Shingles Off a Roof
- A crowbar
For working in tight spaces and prying off roofing shingles or nails that have been inserted too far down into the roof panel, this is one tool that cannot be left out.
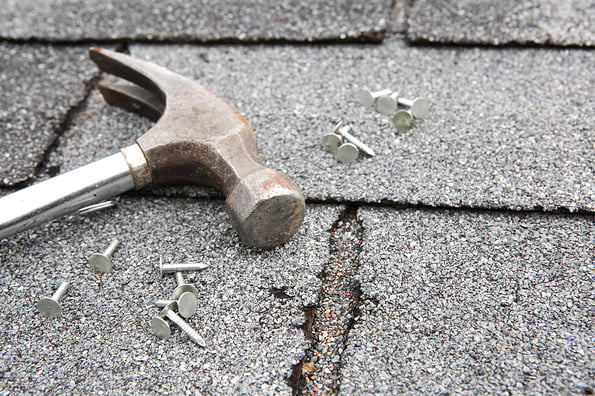
- A hammer (or utility knife)
A hammer is an invaluable aid and necessary for any homeowner undertaking this project by themselves. You can use it to knock shingles loose enough so they can be pried off by hand or anchored with a crowbar.
- A flathead screwdriver
Many shingles use screws to hold them on, which means you will have to remove them to pull off a shingle. If you do not have screws, you can use a flathead screwdriver for the most professional results.
- The proper shoe
You will need protective footwear to walk around on top of roofs and crawl through tight spaces, so always wear sturdy closed-toe shoes (like rubber-soled shoes). You will also want to wear work pants and long sleeves because shingles can be very sharp.
- A utility knife
This is another valuable tool for removing nails once you have pried the shingles loose. If you do not have one on hand, you can use a small crowbar to pry nails out or even tear the shingle away from the nail that holds it in place.
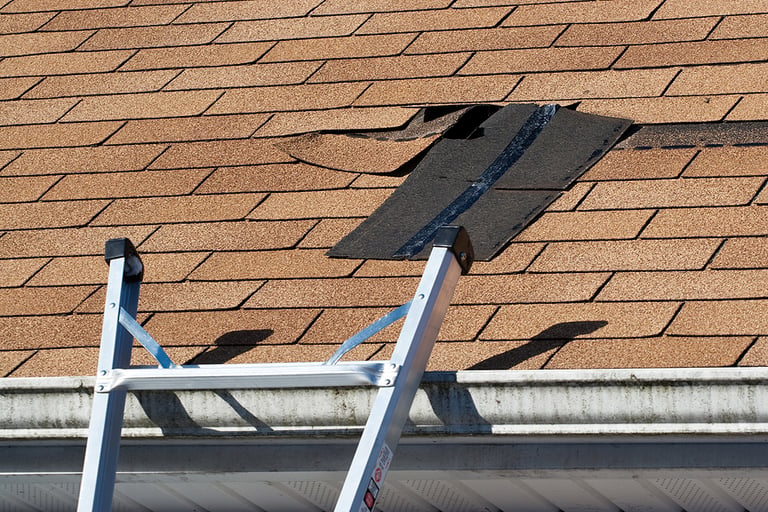
- A ladder
A ladder is one of the critical tools for removing shingles, especially if you are unsure what shape your roof is in and whether it is safe to climb up on top of it.
- Rope
A rope and pulley help lift new shingles on the roof. If you want to replace the entire roof, this may be useful if you have a second person who can hold it steady while you nail it down.
- Chalk Line
A chalk line helps measure out new shingles and be able to cut them all out at once with a saw instead of having to do it piece by piece. That will save you time, too.
- Roofing hammer
A roofing hammer may be handy for removing the nails which hold the old shingles on the roof, but you should use a pull bar or pry bar over it to contain yourself and keep yourself safe. The best way to remove nails is with elbow grease and a hammer. Ensure to wear your safety gear, too.
Step by step guide on How to Tear Shingles Off a Roof
Step 1: Identify the shingles that need to be removed.
The first step is to determine which shingles need to be torn off the roof. This can happen when you are re-roofing or a storm has damaged your roof. It also occurs over time as shingles are exposed to light and cause their surface material (usually asphalt) to break down from ultraviolet radiation. To identify the shingle that needs removal, you will usually notice nails sticking up on the roof, along with loose or curling flakes on top of those nails where a large portion of the other shingle has chipped off (usually just one corner).
Step 2: Temporary Support and Protect the shingles.
To curb any damage to the roof or your body, you will need to support the shingles that need removal temporarily. One of the most common methods is using a temporary fence made from metal poles and metal wire (most of which are now available in 1-foot by 3-foot sections). Once connected with metal wire, these fences should be able to support up to 300 pounds. However, it is also possible to use plastic sheeting rolls with fixing posts on either end for a more industrial look. Fixing this next step on your own may cause additional problems later, so call a professional roofer if you are unsure.
Step 3: Remove the Nails
Use a pry bar to remove nails sticking up from the shingles, then pull up the chipped portion of the shingle. Do not use a nail gun for this. If there are any loose nails, replace them under small parts of the shingle, so they do not come off when you hit them with a hammer (leaving your metal wire fence in place).
Step 4: Tear Off Shingles from the Roof
Using either a long-handled metal crowbar or a pry-bar, flex the metal wire fence to separate it from one roof section. Then, using a hammer and chisel, strike the metal securely into one of the supports. This should leave you enough room to slide your hand under the last shingle and tear it off.
If you have paper-backed roofing shingles, you will need to remove only the top layer before removing all the other layers. As revealed at Technonicol website, you should begin by removing nails from sheets near which you plan on working. Use an ice breaker or pry bar for this task, and be careful not to damage any nails below where you are working, as they are still holding sheet material in place.
If you are unsure if your shingles are paper or metal, you may want to remove the entire bottom layer (paper) first. If you do, work from the center of the roof outward so that your weight is properly distributed.
Step 5: Clean up Roof
As soon as the roofing shingles have been removed, use a pressure washer or wet/dry vacuum to clean up any loose material from the roof, including loose nails around exposed nails (as well as any debris from your removal process), small bits of shingle that may have been left on surrounding metal for support, or any dirt/debris that has fallen onto your neighbors’ homes (if you participated in this project).
Step 6: Thoroughly Clean up any Debris
Ensure you have plenty of room in a garbage bag. If the debris you collected contains nails, use the bag to hold them. A trash bag would work as well. It keeps them contained and does not let them fall out while walking back to get another load (it also reduces the chance of damaging your vehicle). Ensure that everything inside the bags is dry before you toss it away. If water has gotten inside, leave it out for a few days to evaporate. Leave as little mess behind as possible.
Step 7: Replace any Shingles Needed.
The last step is to replace shingles where needed (including replacing nails). Be sure to replace the nail heads (if they are no longer there) before putting on new shingles. If the old shingles have chipped, consult your local building code to see if you need any permits, a building inspection, or both.
Precautions when tearing Shingles Off a Roof
Warn Others
When you are starting a project that involves tearing off shingles, it is critical to let people around you know what is going on. If anyone is working on the roof, they should come down before you start removing the old layer of shingles. You will want to ensure your family and pets are also out of harm’s way during this process. When tearing off old layers of the roofing shingles, it is not unusual for loose shingles or pieces of wood to fall as you work. These pieces of material can cause harm if they strike someone. Your family and pets should be in a safe area, preferably inside.
Disconnect Electrical Wiring
The old shingles layers on your roof may have electrical wiring connecting to a solar panel or venting system. Before taking these shingles off, you will want to ensure these electrical systems are turned off, disconnected, or removed. You should also check all the wires leading from the power source to ensure they have been appropriately insulated and secured before you begin tearing off shingles. You would not want any sparks striking the combustible materials covering your roof.
There are various options to choose from when it comes to removing shingles. The easiest, least expensive, and the most do-it-yourself-friendly way is cutting them off with a roofing hatchet or pry bar. You may also use power tools, such as an electric roofing saw or rope trimmers, but this typically requires hiring a contractor.
Image Source: BigStockPhoto.com (Licensed)


Share options
Share a link that only Beer Connoisseur subscribers can access